
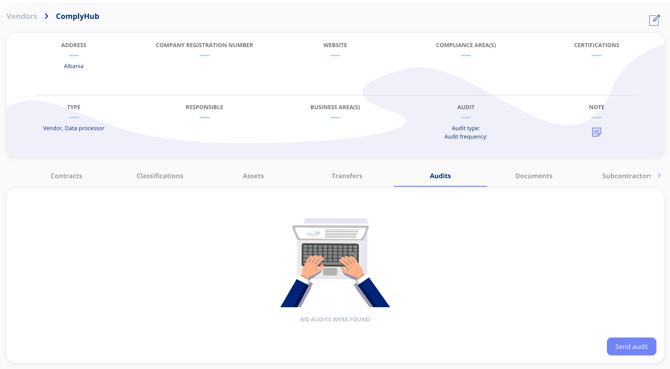
To send an external audit from a single legal entity in dotLegal, ensure your audit template is active, then navigate to the relevant legal entity, open the Audits tab, and click Send audit. Follow the steps below for full details.
You can send external audits in two ways:- Send directly from a single legal entity (covered in this article)
- Send the same audit to multiple legal entities simultaneously using audit groups. Read more here: Send external audits to multiple legal entities at once.
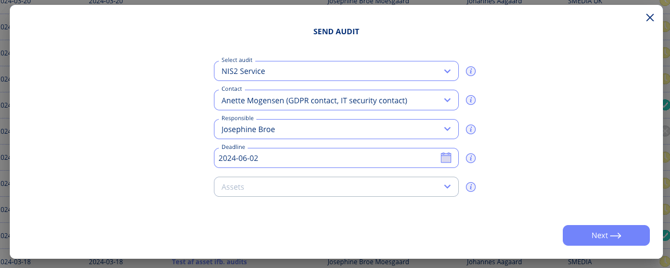
Select which audit you want to send. In the dropdown menu you can choose between all active audit templates. Choose the contact the audit should be sent to. Available contacts are those you have created under the Contacts tab on the company page. Each contact's role is shown in parentheses after their name. Afterwards, select the individual who will be responsible for the audit process. The chosen person’s name and email will be included in the email sent to the designated contact.
Choose a deadline for the contact to complete the audit. The deadline is included in the email sent to the contact. Note that the contact can still submit the audit after the deadline has passed — the deadline is used for reference and formalisation purposes only. Optionally, choose one or more specific assets the audit should be answered in relation to. You do not need to select any assets in order to send your audit.
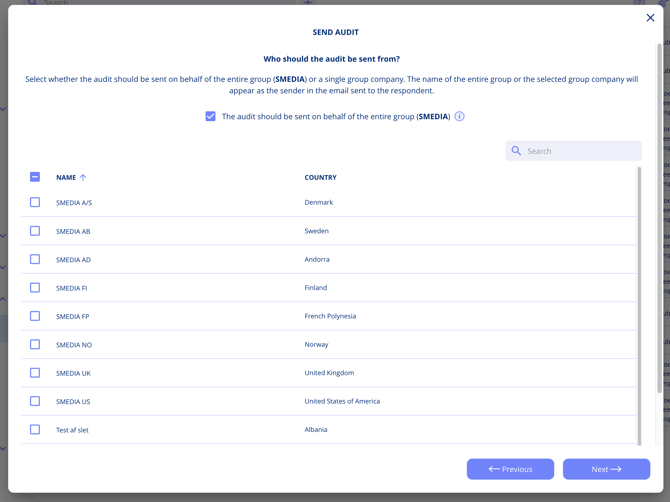
Click "Next" at the bottom of the dialogue and select whether the audit should be sent on behalf of the entire group or a single group company. The name of the entire group or the selected group company will appear as the sender in the email sent to the respondent.
- If sent from the entire group, all users will have access to the audit in the audit overview
- If sent from a single group company, only users with permission to that group company will have access to the audit in the overview
- If a user only has access to one group company, this step will not be shown and the audit will be sent from that group company automatically
Finally, review the summary of chosen elements before sending the audit. Confirm the contact's email address is correct — if not, update it under the Contacts tab. Click Send to send an email containing a link to the audit to the contact.
Reminders are sent automatically every 7 days until the audit has been submitted or closed. You can also send a reminder manually from the overflow menu.
Email example:
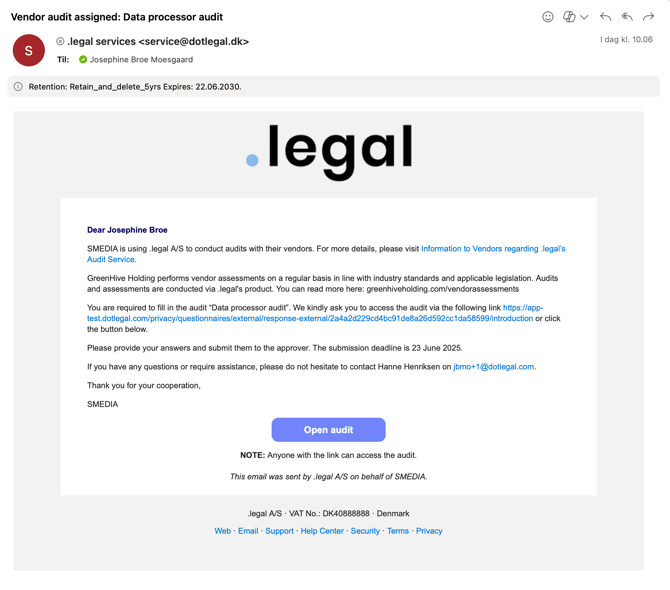
You can customize the emails you send with your own logo and description. Read more here:Add you own logo and text to audit emails.