Contracts - Overview, add and export
This is a guide on the contracts overview and how to add and export contracts
When clicking on the "Contract" icon in the menu on top of the screen followed by one of the possible standard searches (All Contracts or My Contracts) the Contract List screen is shown.
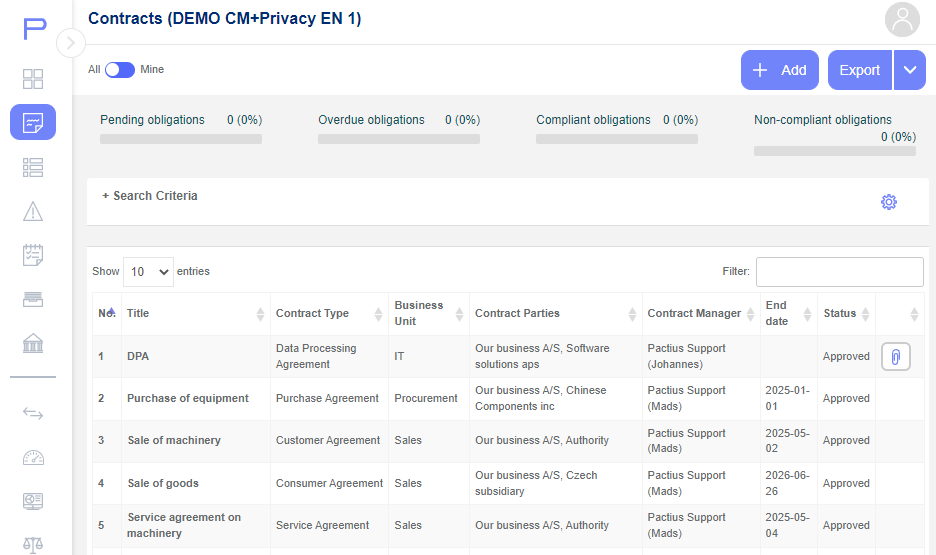
The contract list shows a view of contracts, based on the respective search result. The figure below shows an example of the standard search "My Contracts":

On the top of the screen is a status of all obligations related to all contracts shown on the list. In the top left you can specify the number of lines you want shown on each page of the list (standard is 10 lines/pages - but can be changed at the User level). On the top right is a Search box in which the current search can be defined further by typing a text string (e.g. if "claim" is typed only the lines holding the phrase "claim" will be shown). In the bottom right, you can change pages.
If you want to enter a contract you press the specific contract which will take you to the contract header screen.
If there is a "paperclip" icon on the right side, it is shows that a main document has been defined on the contract. By clicking on the icon, you will be able to open the main document from the contract directly from the contract list screen.
Status bar details
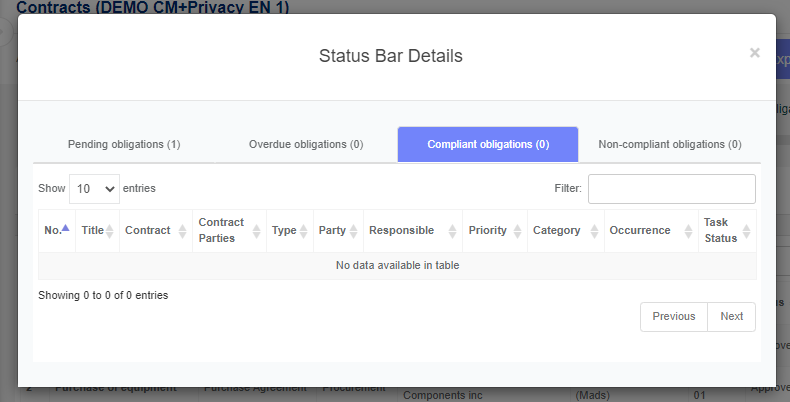
By clicking on a respective obligation status field, i.e. Overdue obligation, you can get additional details about the status of the said obligation. In the below example shows an example on clicking on the overdue obligations section:

From the status bar details it is possible to go directly to the specific obligation simply by clicking on the title of the respective obligation.
Search for a contract (advanced)
By clicking on "+ Search Criteria" on the top left side of the contract list screen, the search criteria area opens up and provides the possibility to define your own searches among a number of different search criteria. When creating own searches it is also possible to save the search for later use - see user defined search.
Add a new contract
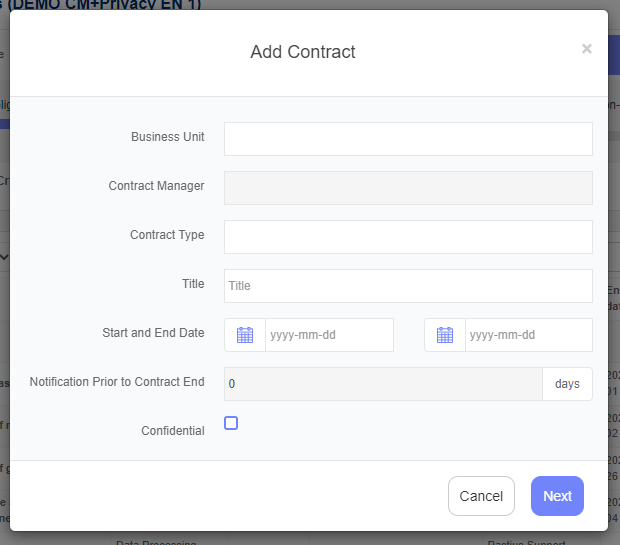
A new contract is added by clicking on the “+Add” button on the top right-hand side of the contract List screen where a pop-op window will appear:

Now all basic information about the contract can be entered.
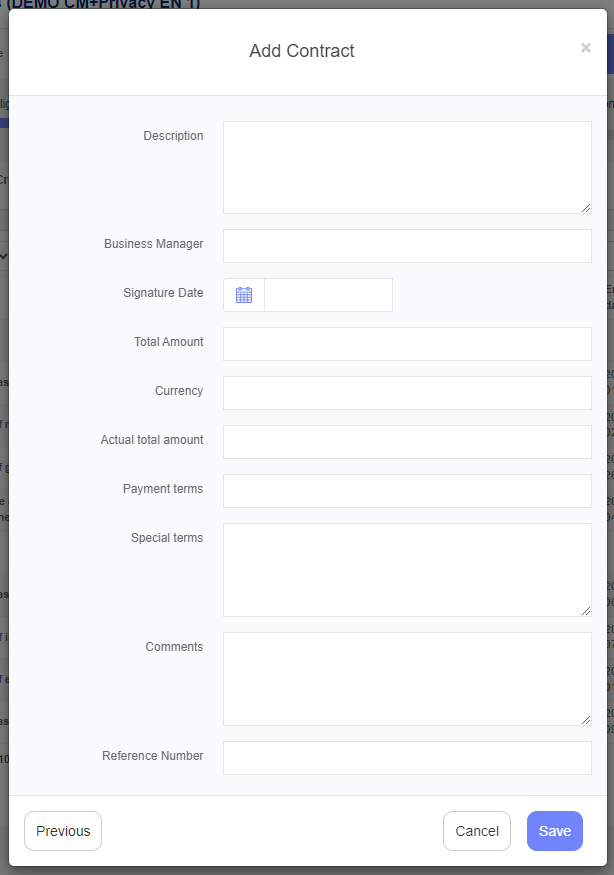
When finished, click on the "Next" button. Depending on how your contract type has been set up, you now come to a second pop-op screen showing you additional fields, where you may add data (including any customized/Flex Fields):

When finished inserting data, click on the "Save" button. As the contract gets saved, a unique contract number is assigned as well as the Status "Draft" and the system takes you to the contract header screen. As long as the contract is in "Draft" Status, no notifications are sent to the users.
Note: The second pop-op window will vary depending on how each contract type has been set up in the system.
Export contract list
All contract lists can be exported to Excel by clicking on the "Export" button on the top right-hand side of the contract list. This will open up an Excel document holding all metadata from each contract (not just the ones you see in the list).
