Fields
The list below contains all standard legal entity fields. Fields marked with (*) are mandatory in the system.
|
Field |
Description |
|
Name * |
This is the name of the legal entity Note: This must be unique in the system. |
|
Address |
This is the address of the legal entity |
|
Address line 2 |
This is address line 2 if the address spans over more than one line. |
|
Address line 3 |
This is address line 3 if the address spans over more than two lines. |
|
Zip code |
This is the zip code of the legal entity |
|
City |
This is the city of the legal entity |
|
Country * |
This is the country of the legal entity. The list of available countries is maintained by your account administrator. |
|
Legal entity category |
This field holds the category of the legal entity (if the legal entity has been categorized). |
|
Company registration number |
This is the company registration number (e.g. VAT number) |
|
Reference number |
This is a company reference number. The number is used for reference between a legal entity in PACTIUS and a legal entity in another system (e.g. ERP, CRM etc.) |
|
Active * |
This flag indicates whether the legal entity is active in the system or not. If the legal entity is deactivated, it can no longer be associated with a contract. |
Legal entities
A legal entity is an organisation or a person or anything that may act as a party to a contract. Typically, a contract has two or more parties (legal entities).
When you associate legal entities with contracts and data flows, it is possible to get an overview of all contracts, obligations and data flows for a particular legal entity.
The legal entity list
When clicking on the legal entity icon in the left menu, the legal entity list screen appears. The legal entity list holds a view of all legal entities.

In the top left, you can specify the number of lines you want to have on each page of the list.
Note: By default, 10 lines per page are shown. However, this can be changed in the user settings.
On the top right is a filter box in which the current search can be refined further by typing a text string. In the bottom right, you can change pages.
Tip: If you, for example, type "inc", only the legal entities holding the phrase "inc" in one of the fields will be shown.
If you want to enter a legal entity, you click on the bar on the specific legal entity which will take you to the legal entity view screen.
Add a legal entity
The purpose of editing a legal entity is to change the basic information of the legal entity, such as its name, address, zip code, country and company registration number as well activation/deactivation.
Step 1
A new legal entity is added by clicking on the “+Add” button on the top right-hand side of the legal entity list screen after which the following pop-up window appears:

Step 2
Now all basic information about the legal entity can be entered.
Click on the “Save” button when you are finished.
Note: As the legal entity is saved, it becomes “Active” which means contracts and data flows can be associated with the legal entity.
Edit legal entity
A legal entity can be edited directly from the list screen by clicking on the “pencil” icon on the right-hand side of the legal entity (see also legal entity view screen).
Export legal entities
All legal entities can be exported to Excel by clicking on the “Export” button on the top right-hand side of the legal entity list screen. This will open an Excel document holding all metadata from each legal entity (not just the ones you see in the list).
Import legal entities
You can import legal entities using an Excel spreadsheet.
Step 1
Click on the "Import" button on the top right-hand side of the legal entity list screen.
Step 2
When clicking on the "Import" button a small pop-up appears in which you can upload an Excel spreadsheet to the system:

Note: The first time you are importing from Excel, you should download the import template that is used for filling in. The import template is downloaded by clicking on "Download import template" in the pop-up box (see the picture above).
Step 3
When you have updated the spreadsheet with relevant information, the spreadsheet should be saved and uploaded. Click on "Choose file" in the pop-up window to choose the spreadsheet.
Click on the "Validate" button (see the picture above)
The system will now upload and validate the spreadsheet for errors.
Step 4
Upon completion of the validation, the legal entities import preview screen appears:
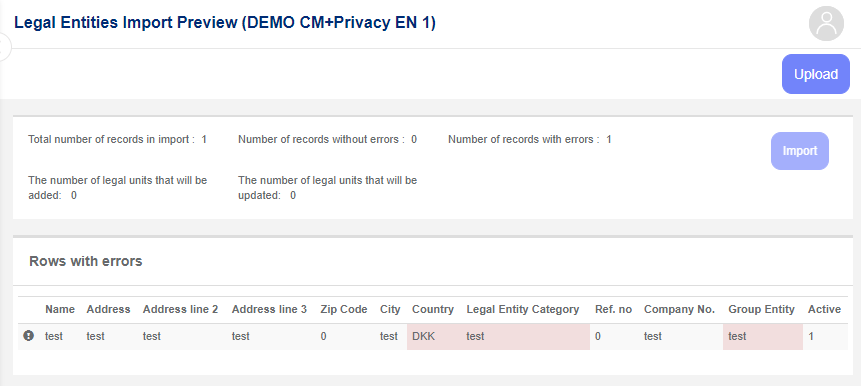
At the top, the total number of rows included in the validation is shown along with the total number of rows with errors.
In case of errors, these will be highlighted in red.
Tip: By hovering over the red areas, associated error messages can be viewed (see the example above of an upload with errors).
Correct any errors and repeat the upload- and validation process.
Step 5
Upon successful validation, with no errors, the number of records with errors will be empty, and the "Import" button will be made available.
You can go through the rows without error to get an overview of what is going to be imported into the system before it happens.
If you click on the "Import" button in the confirmation pop-up window, the import begins.
Note: The import might take some time if you have many rows in the spreadsheet.
Step 6
Upon completion of the import, the following pop-up window is shown holding the total number of actual legal entities imported:

Click on the "OK" button to complete the import after which you return to the legal entity list screen and can verify the legal entities imported.
Note: If you give the legal entities a reference number, you have the opportunity to update all imported legal entities. This can be an advantage if you regularly want to update your legal entities, e.g., from an ERP system.
Note: To update all existing legal entities in the system, you can start by exporting all legal entities into Excel and then build your import file based on these data.
View and edit legal entity
The legal entity view screen holds different types of metadata as well as related information regarding the legal entity.
At the top, the legal entity name is shown. The screen then consists of two parts:
- The legal entity metadata section holds all standard fields.
- Two panels/tabs holding all contracts associated with the legal entity and all obligations for which the legal entity is responsible.
- A panel holding all data flows associated with the legal entity (if data privacy is configured for the system).

Click on either "Contracts", "Obligations" or "Data Flows" to see each of the lists.
Tip: You can use the filter box at the top right to further narrow down your list.
Status bar details
By clicking on one of the status fields on the status bar on top, you can get additional details about the contracts/obligations for the legal entity being in this status. The example below shows a pop-up window where "Overdue obligations" has been clicked on.
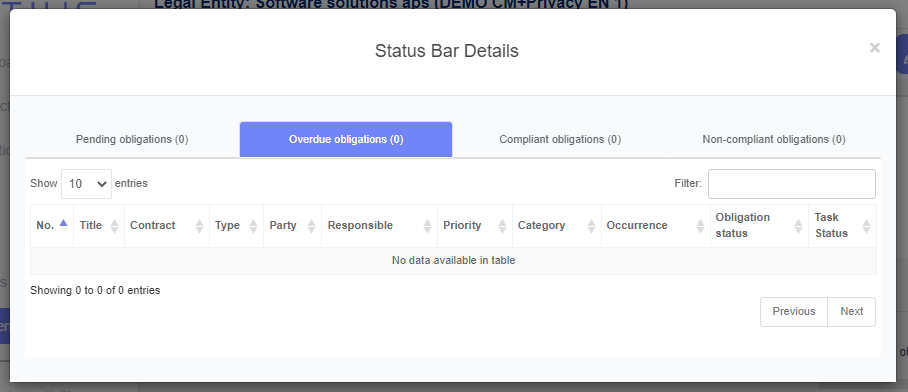
From the status bar details, it is possible to go directly to the specific contract/obligation for the legal entity simply by clicking on the title of the specific contract/obligation.
Edit legal entity
To edit a legal entity, you click on the "Edit" button on the top right-hand side of the legal view screen. The following pop-up window appears:

After changing relevant information, you click on the “Save” button and will return to the legal entity view screen.
Note: You can deactivate a legal entity. If you deactivate a legal entity, you can no longer use it as a contracting party of your contracts.
Tip: At the top of the help article, you can get a further description of every field under "Fields".
Delete legal entity
It is possible the delete a legal entity if it is not used on any contracts, obligations and data flows. In this case, you click on the "Delete" button on the top right-hand side of the legal view screen (which is visible only when the legal entity is not used in the system at all).