
The scale determines how detailed the assessments in a risk area can be. It can run from 1 to 3 at its simplest, or up to 1 to 6 where you need more nuance. You also decide what each level is called and which icon it uses, so an area can work in the vocabulary its own specialists already use.
Watch this video about setting up risk areas.
You need admin rights with access to edit master data to create risk areas.
- Go to settings and select risk areas in the setting-menu.
- Click create risk area
- Find the Scale section.
- Choose the range the area should use, for example 1 to 3 or 1 to 6.
- Click into each level and enter the name you want. For example Low, Medium, High in one area, and Negligible, Limited, Significant, Critical in another.
- Select an icon for each level, so the levels can be read at a glance.
- Set a risk appetite for the area if you set 3, all risk above 3 (4, 5, 6) will be considered high risk
- Edit the levels of risk in the matrix by selecting the cells
- Click Save.
- Now you will find your new risk area in the menu.
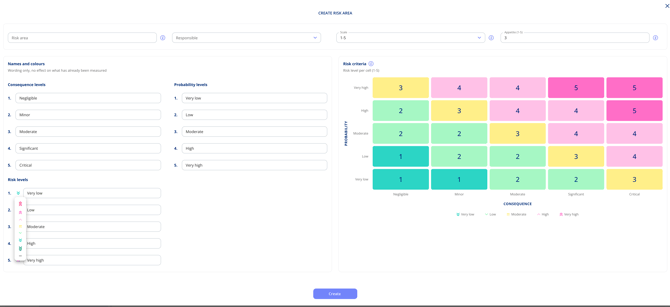
Please note: changing the range affects the risk matrix for the area, because there are now more or fewer combinations to map. Review the matrix afterwards to make sure it still produces the risk levels you expect.